


Document Actions
gvSIG-Desktop 1.12. User manual
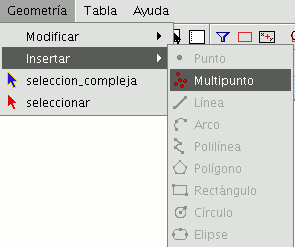
You can activate this tool by clicking on the “Multipoint” button in the tool bar

or by going to the “Geometry” menu bar then to “Insert” and “Multipoint”.
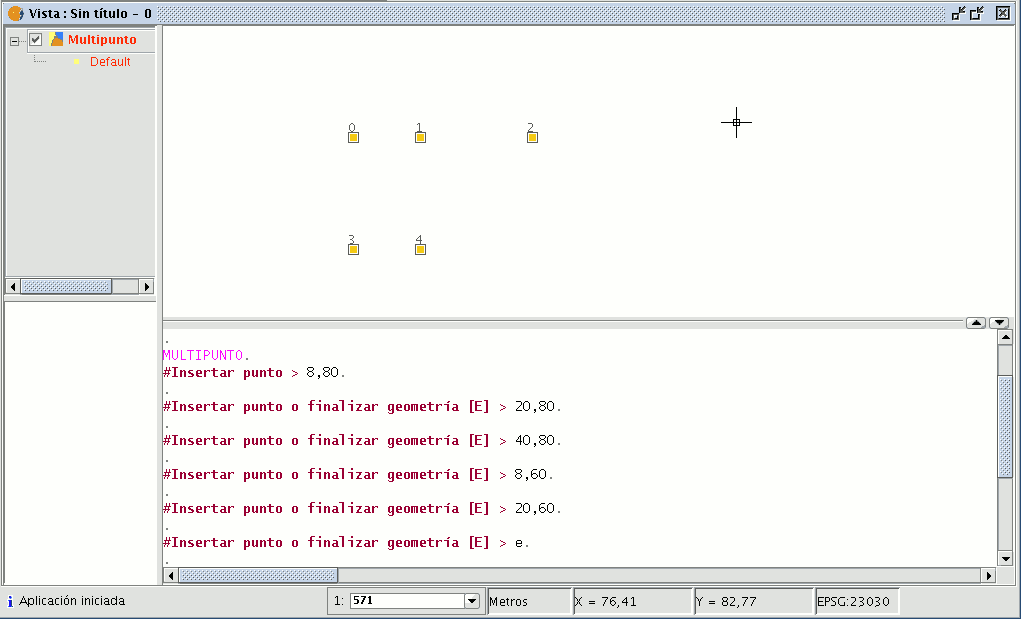
You can use the multipoint tool to create a drawing made up of a series of points which function as a single feature (i.e. we only need to select one of the points for the rest to also be selected). You need to bear in mind that this is not thus a points layer but a multipoint layer.
To insert a multipoint in the graphic area, select the tool and place the cursor over the part of the graphic area you wish to place the point. Left click on the mouse to insert the point. Repeat this step as many times as you wish. When you have finished adding points, right click on the mouse. A contextual menu will appear. Click on “End” to finish the new multipoint feature.

You can create a multipoint feature from the command console. To do so, write the command “multipoint”. Input the coordinates of each point you wish to add in the console and press “Enter”. To finish the insertion of the new multipoint feature, write the command “E”.
Cached time 11/21/13 14:59:45 


